Barkuterie Boards… have you heard of them?! You may know of the human version – a charcuterie board filled with the best cheeses, fruits, preserves, honey, nuts, etc… they’re super pretty, the paring possibilities are endless and I’m a big fan! Just give me some wine and a good charcuterie board and you can just leave me there and I’m one happy gal!
I’ve been seeing the pup version, coined “barkuterie boards” more and more on Instagram and have fallen in love! I’ve always thought that to live your life every day eating kibble or the same food can’t be enjoyable, so this is a great way to mix things up and also get some mental stimulation going as they explore their board of yummy goodness.
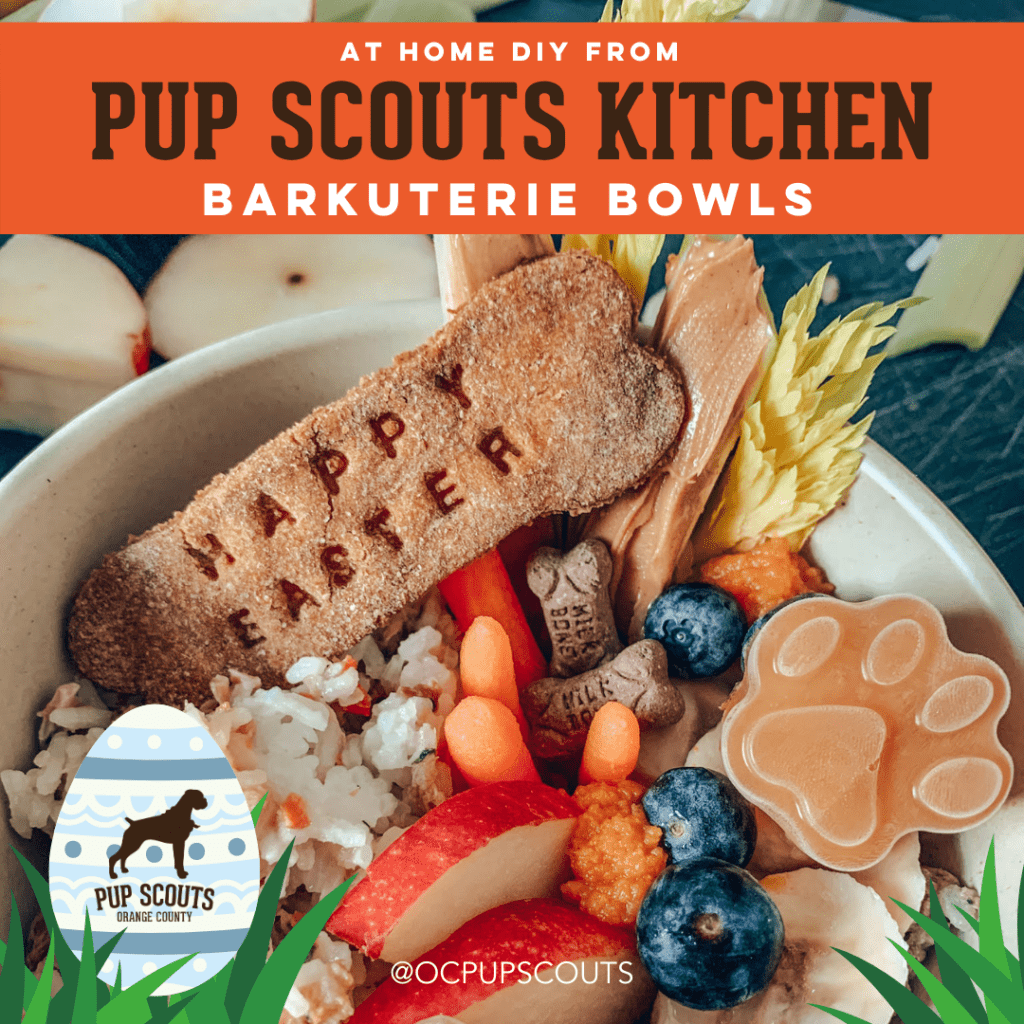
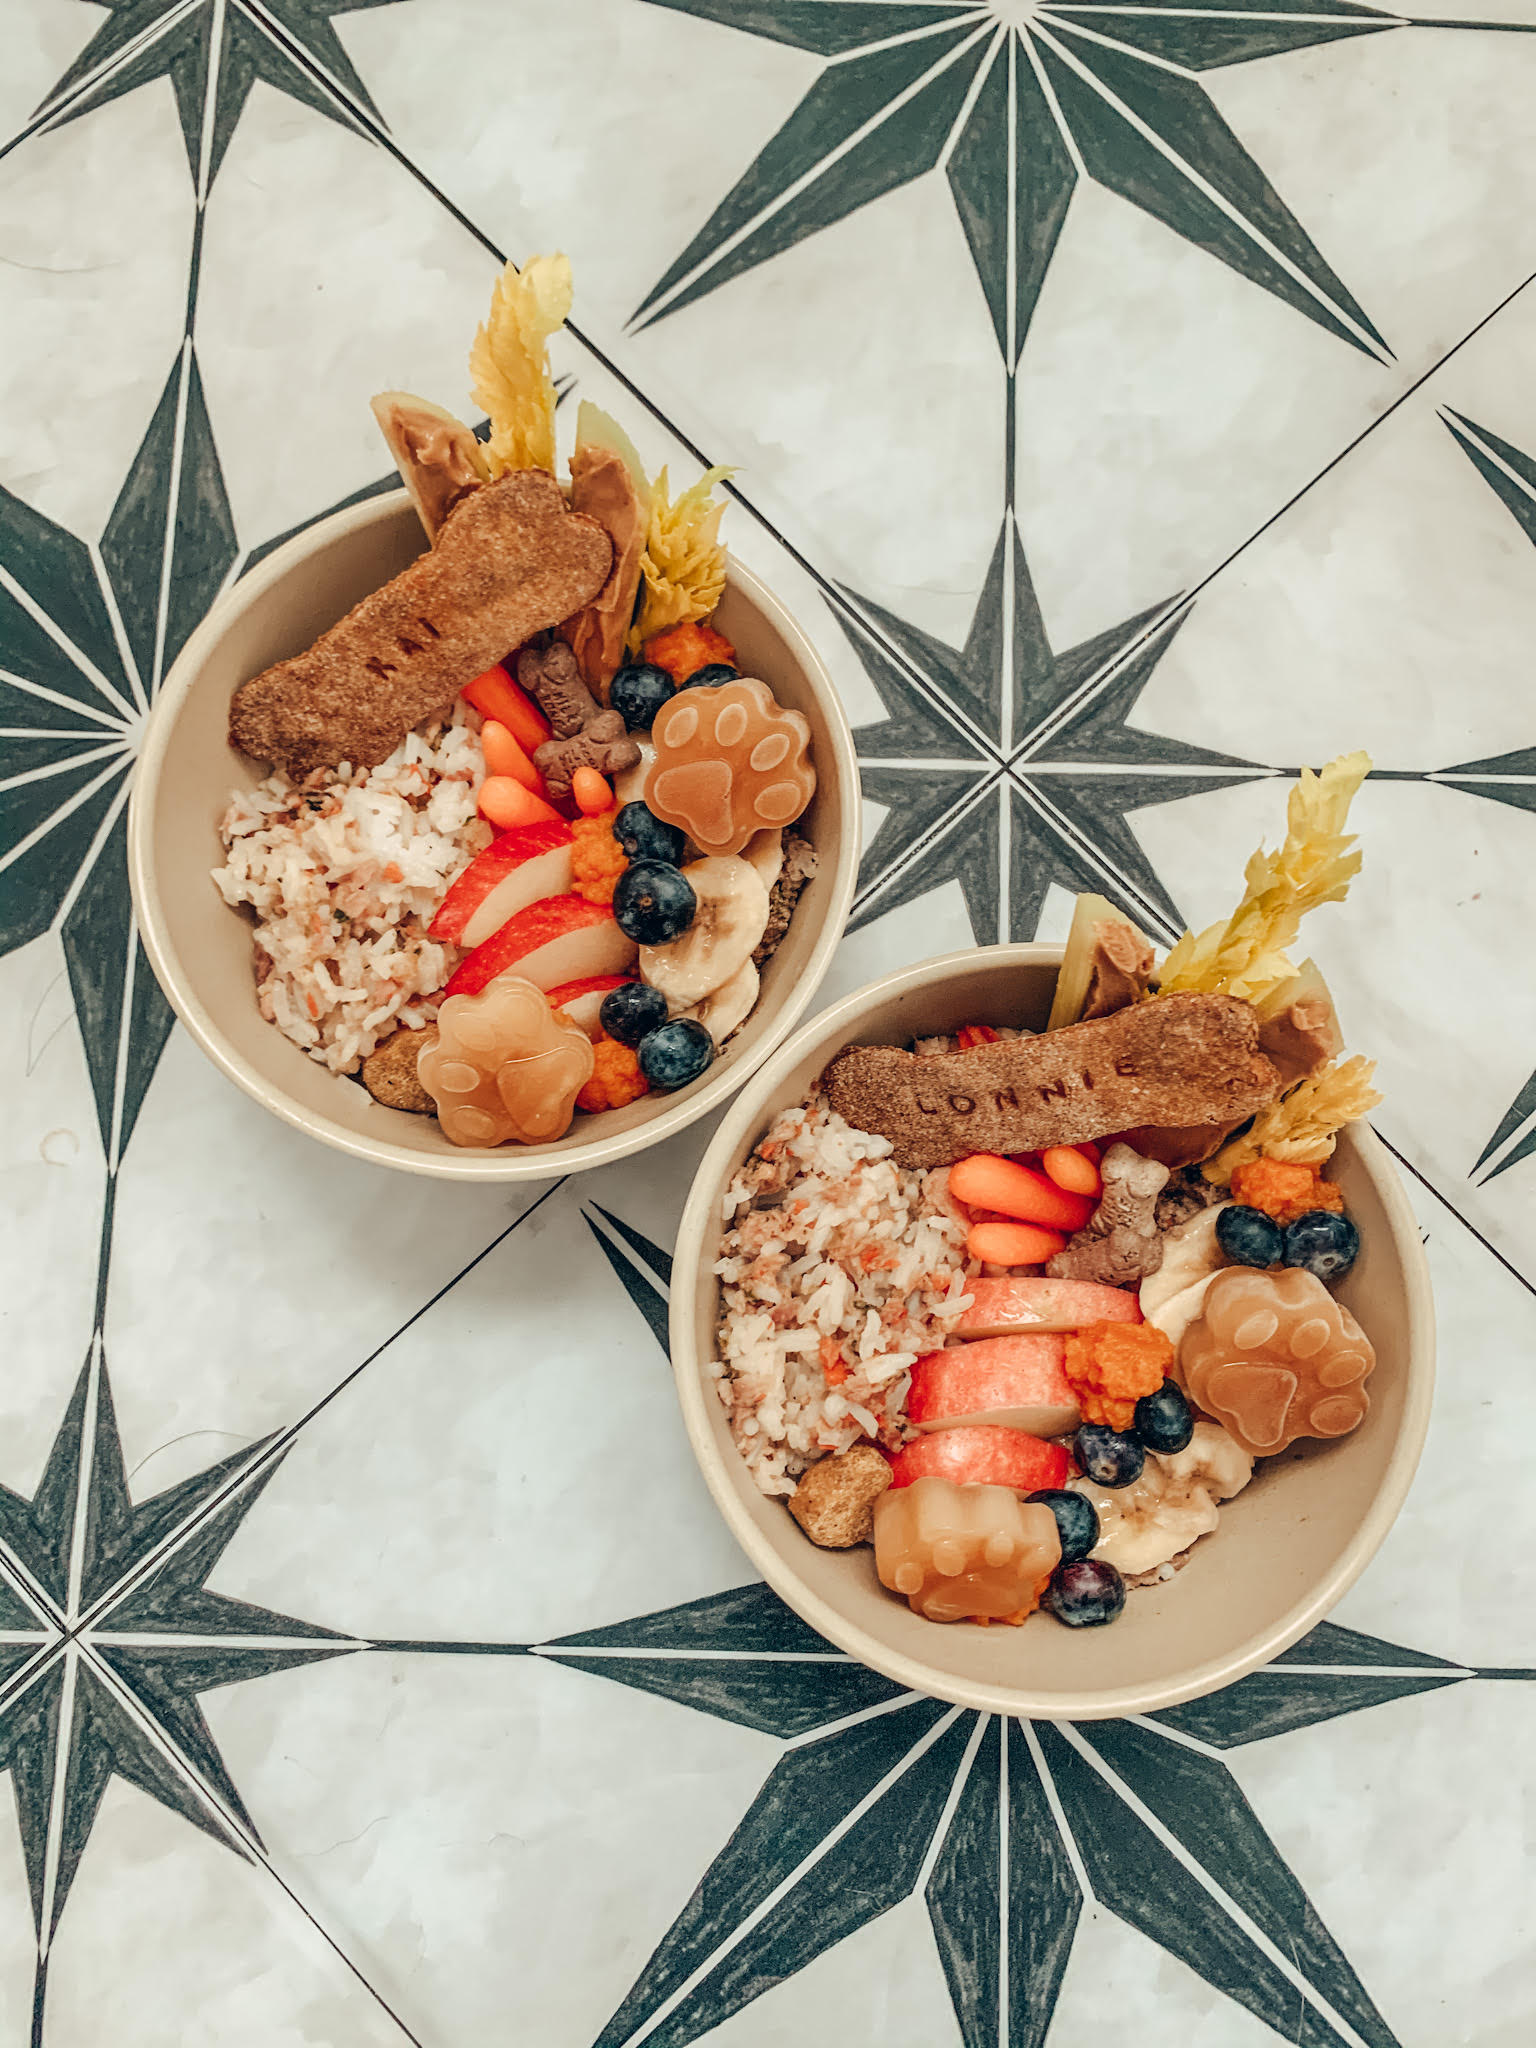
Our east coast friends Dogs of Charm City recently shared a Georgia based company Barkuterie Boards and I was hooked! The cuteness, the creativity, definitely follow them if you don’t already! DOCC and Barkuterie Boards inspired me to put a little west coast twist on things… thus Barkuterie Bowls were created in our little Pup Scouts Kitchen! Think a healthy power bowl, ancient grains bowl type of situation… but for dogs!
The best part of these is they are totally customizable! Because of calories and for the simple fact of incorporating “special” foods your pups may not eat all the time, I would recommend you save these for more special occasions or do a smaller version once a week. Definitely know your pup before you decide what to incorporate and base the serving sizes on your dog’s size. If you research or see barkuterie boards online, you’ll see that a lot of them incorporate dehydrated elements (shrimp, sardines, pig ears, etc.) but for cost purposes and to make it easy on momma, I chose to go the more fresh route and incorporate what I have already in the house.
I also wanted to get my fancy on and use some molds and stamps that I both found on Amazon and my goodness, BEST. INVESTMENT. EVER. I now basically want to put every liquid for my pup in these little paw molds and you’ll definitely want to too!
Before I get started, I also wanted to mention this disclaimer that I am not a Veterinarian, just a dog lover like you. While I have done research to know what pup safe ingredients can go into this recipe, always do your own research or ask your Vet if this recipe would be suitable for your own dog. Use your instinct as a dog parent and if you’re not sure if any ingredient of this recipe is suitable for your pup, get creative and substitute it for something you know they love and is safe for them!
Anywho, let’s get started with the step by step and some assembly instructions on how I created these beauties.
Ingredients
Cooking & Prep Time: 30 minutes
Assembly Time: 10 minutes
*For this recipe, you will need:
Main Elements
– White rice
– Veggies (I used baby carrots and celery)
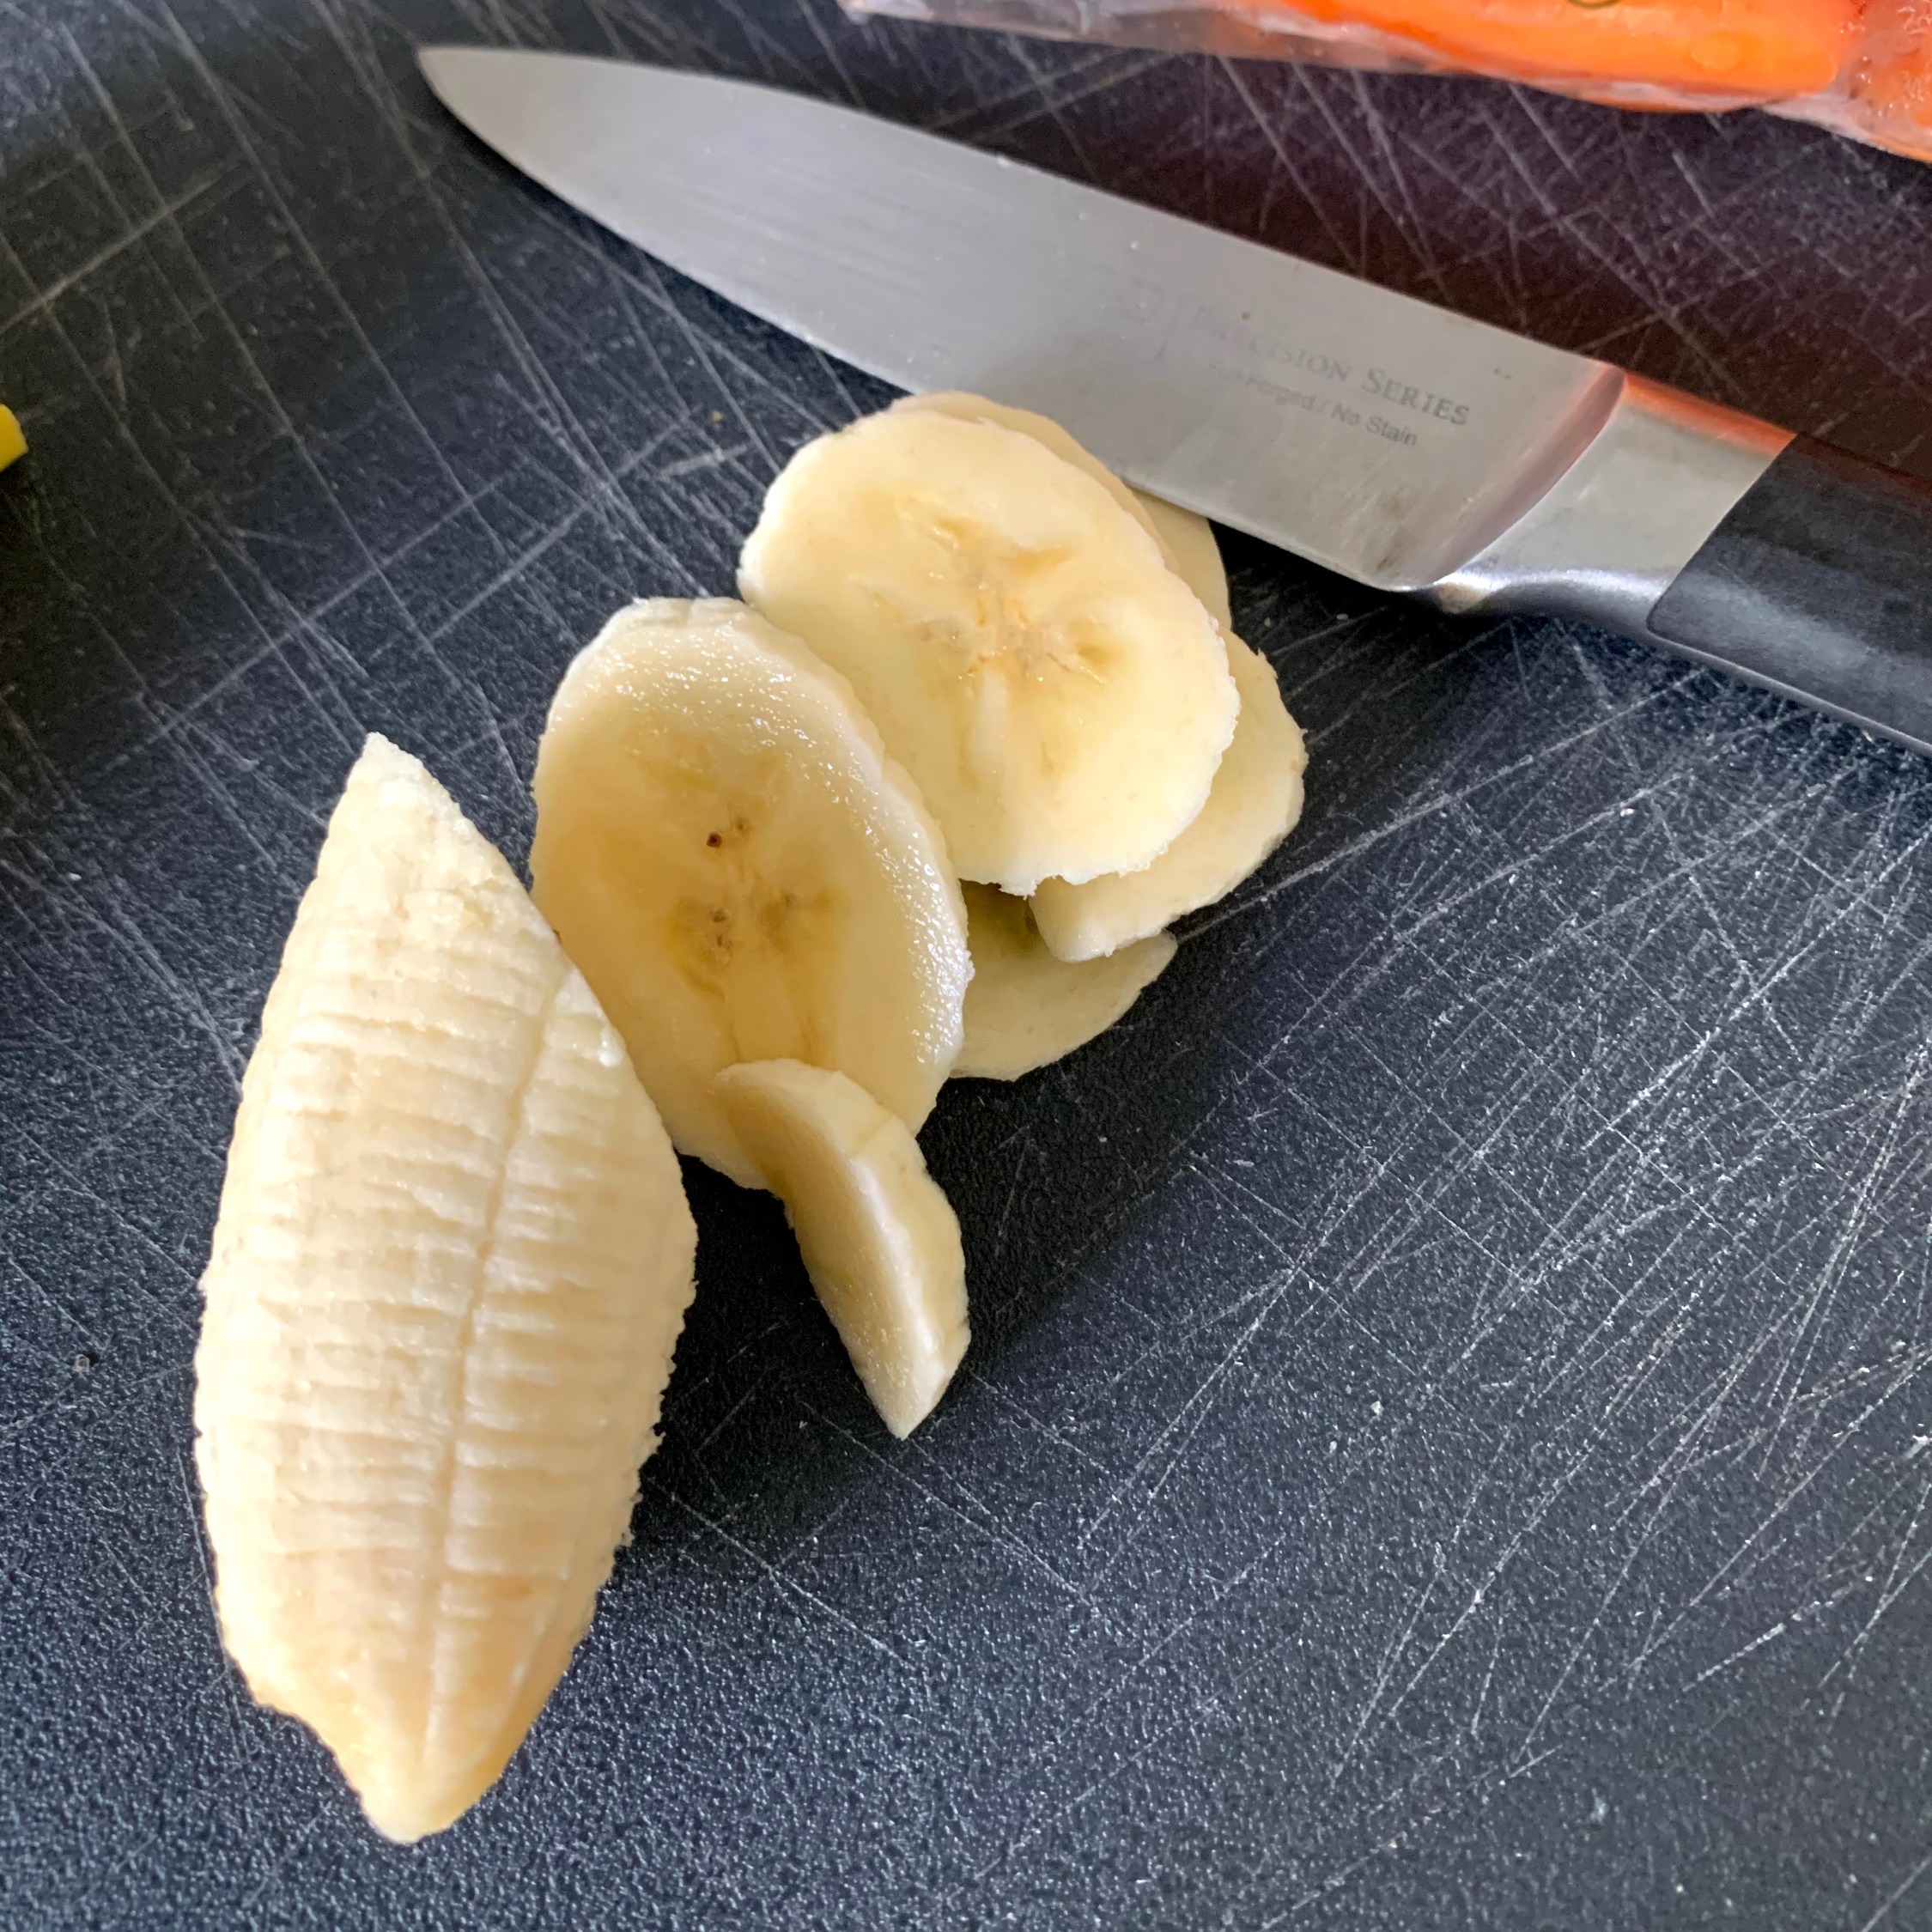
– Fruits (I used bananas, blueberries and applies)
– Wet food (I used both Cali Raw and Purina Ground Wet Food)
– Pumpkin puree
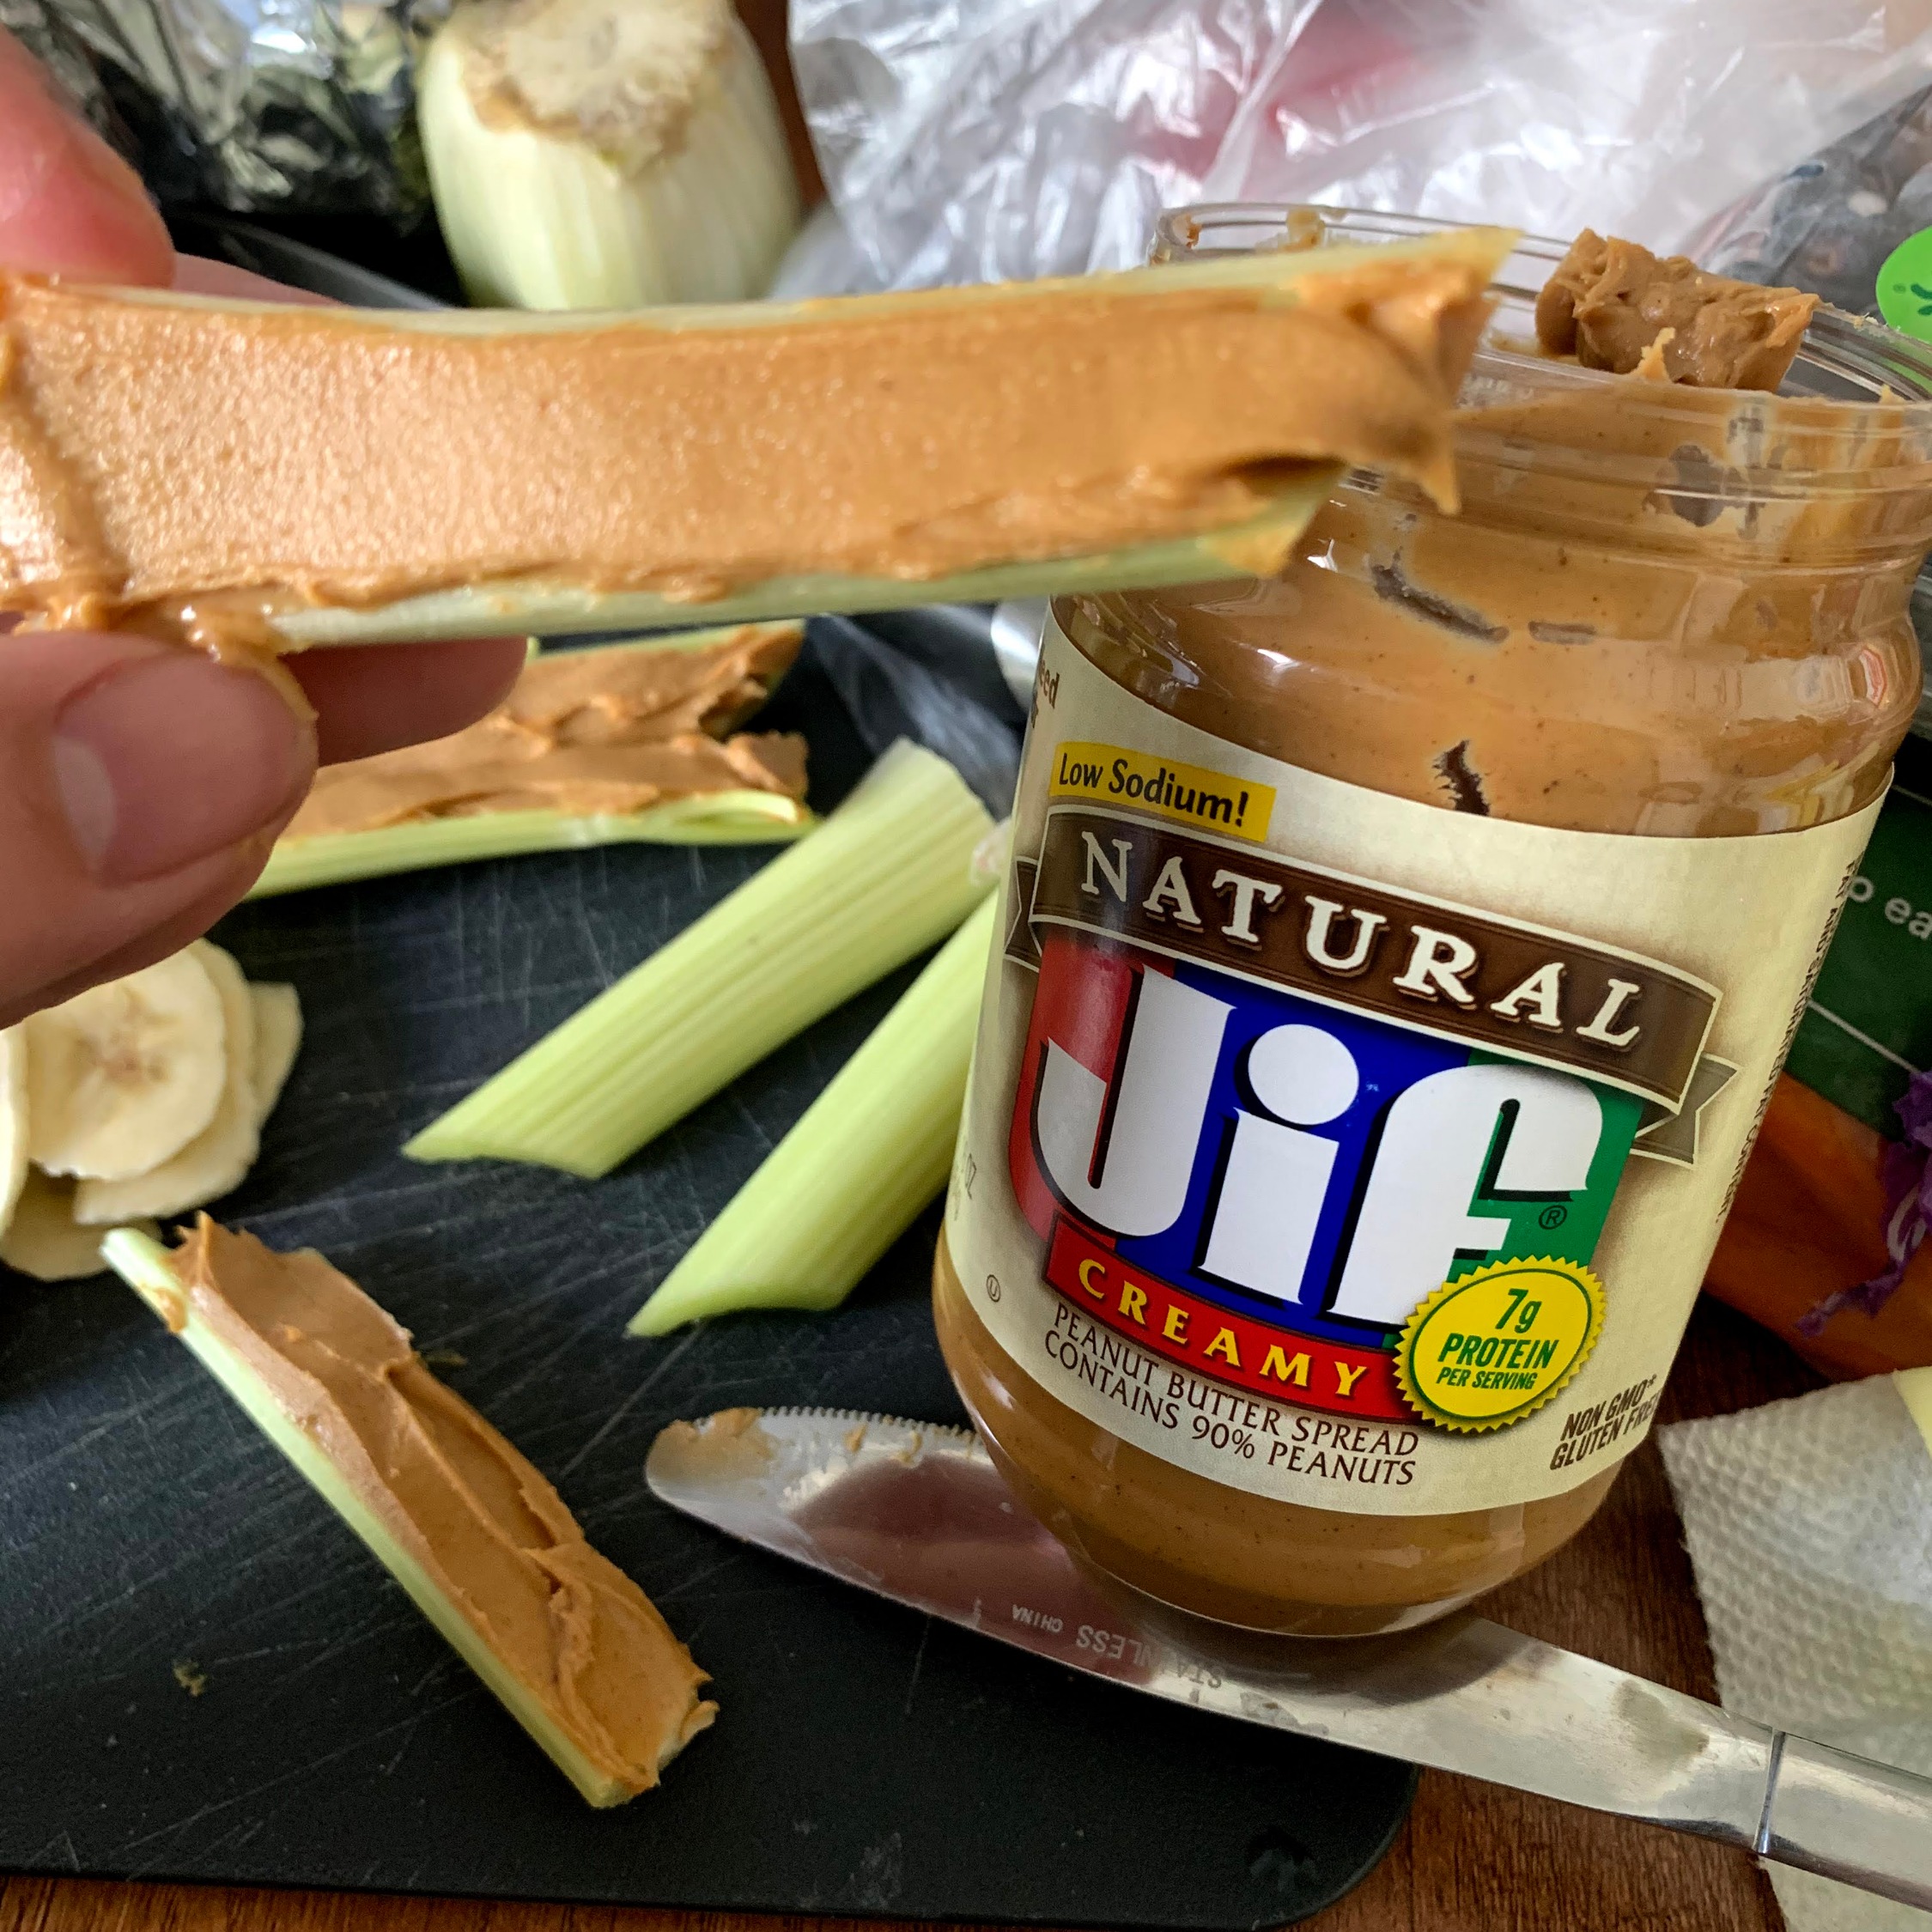
– Peanut butter
Garnishes
– Bone broth
– All ingredients from our Fall Treats Recipe (these are used for the personalized bones on top of the bowl)
– Mini-milkbones
I purchased all of my ingredients from Target just to make things super easy, affordable and simple.
Molds + Stamps
– Paw molds and bone cutters (molds come in a pack of 4 and cutters come in 3 different sizes and can be purchased on Amazon HERE).
– Letter stamps (come in 2 different variations in one awesome kit and can be purchased on Amazon HERE).
Instructions
1. Start by creating the bone broth paws.
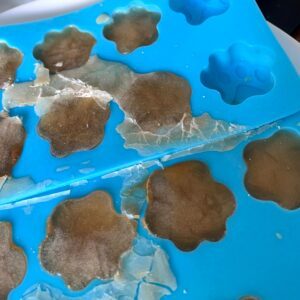
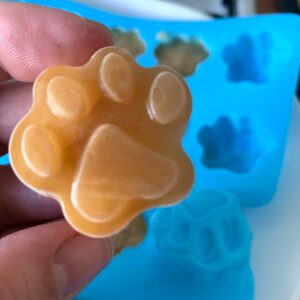
– I poured these out the night before and let them sit in the freezer overnight. To my surprise, they were already pretty set after a couple hours, but I chose to prep them in advance just to make sure they were nice a solid.
– Grab your paw molds and put them on a freezer safe tray or plate. The molds are pretty flimsy, so make sure you have something sturdy underneath it to help transfer them in and out of the freezer easier.
– Place in freezer and let it set until fully frozen.
2. Next, let’s work on the personalized dog bone.
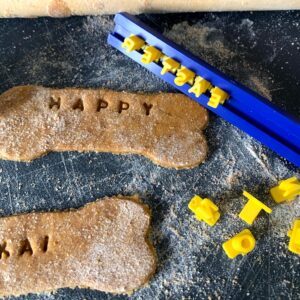
– Hypothetically, we’re now on day two or the day that your bowls will be consumed. To start, let’s work on the personalized bone. Since it has to bake, you can make it real quick and put it in the oven while you prep the rest of your elements.
– I used the recipe from our Fall Treats Blog Post and cut it in half since I was only making 3 bones. Honestly, I could have cut it into 1/3 or 1/4 of the recipe as I had a softball size of batter left but oh well, guess I’ll just have to bake off the excess for the pups. So make as much as you feel you can use or need.
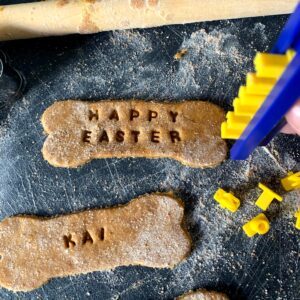
– Roll out your dough and use your silver bone cutters to stamp the bone shape into your dough. I recommend rolling the dough out to be on the thinner side, this bowl is packed with a lot of elements, so a thinner bone will cut a few calories down but still add a little crunchy element to the mix.
– Once your bone is stamped and the excess dough is removed, you are now ready to stamp your personalization (your dog’s name, a message, anything cute like that!). Take a part the individual letters (I just used scissors) and spell out the name you would like. When you place the letters on the holder, insert them backwards (slide in the last letter first). This will ensure when you stamp it, it shows the name correctly.
– Stamp the name (you don’t have to press too hard) and release. Place all bones on a baking sheet and complete the recipe’s instructions.
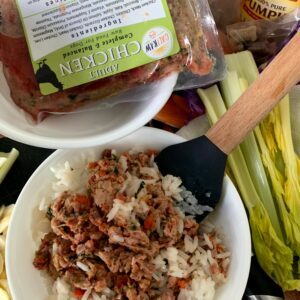
3. Let’s now work on the main elements of the bowl.
– Cook white rice. I was filling two bowls, so I made about 2 cups of rice, but you can make more or less depending on how many bowls you want to make or how big of a portion you anticipate your dog to eat. Make sure rice is fully cooled before assembling your bowl. After my rice was done, I placed it in the fridge to speed up the cooling process.
– Cut all veggies and fruit. There are super fancy ways to do this, but I decided to do some basic cuts (see images below).
– Add peanut butter to your celery (make sure you have all natural peanut butter that is just made of peanuts… ingredients like xylitol are not dog friendly.
– All of your elements should now be prepped and ready for assembly – your personalized bone, cooled rice, fruits and veggies. Now, let’s assemble!
Instructions
1. Add protein of your choice mixed in with your rice.
– When unloading your dog from your car, use the door to help them with spacial awareness. If they try and push the door open, gently close it and try to open it again until they are calm. Request a sit, stay and eye contact before “okaying” them to come out.
– You can practice loading and unloading back and forth to help associate this loading in and out exercise with what they are expected to do when you are at your car.

– Use the rice and wet food as a base for your veggie elements and stick veggies directly into the rice/wet food. I start with the celery. I placed 2 celeries covered in peanut butter and 3 plain leaves just for added texture and nutrients.
– Place baby carrots (I used 4) in front of the celery.
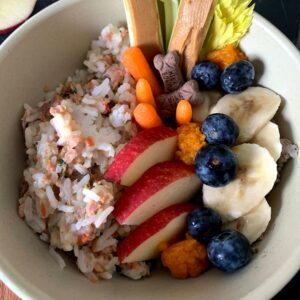
– I then added small dollops of pumpkin puree (3 total)
– Next to each dollop, I stuck 2 blueberries (6 total)
– I also added 2 mini-milkbones in between the carrots and the celery just for added cute factor!
– Optional step, I also added a digestive chew that my pups eat to help them process food. You can mix any medicines or anything like that in this to hide it from pups who don’t like to eat their medicine, probiotics, etc.
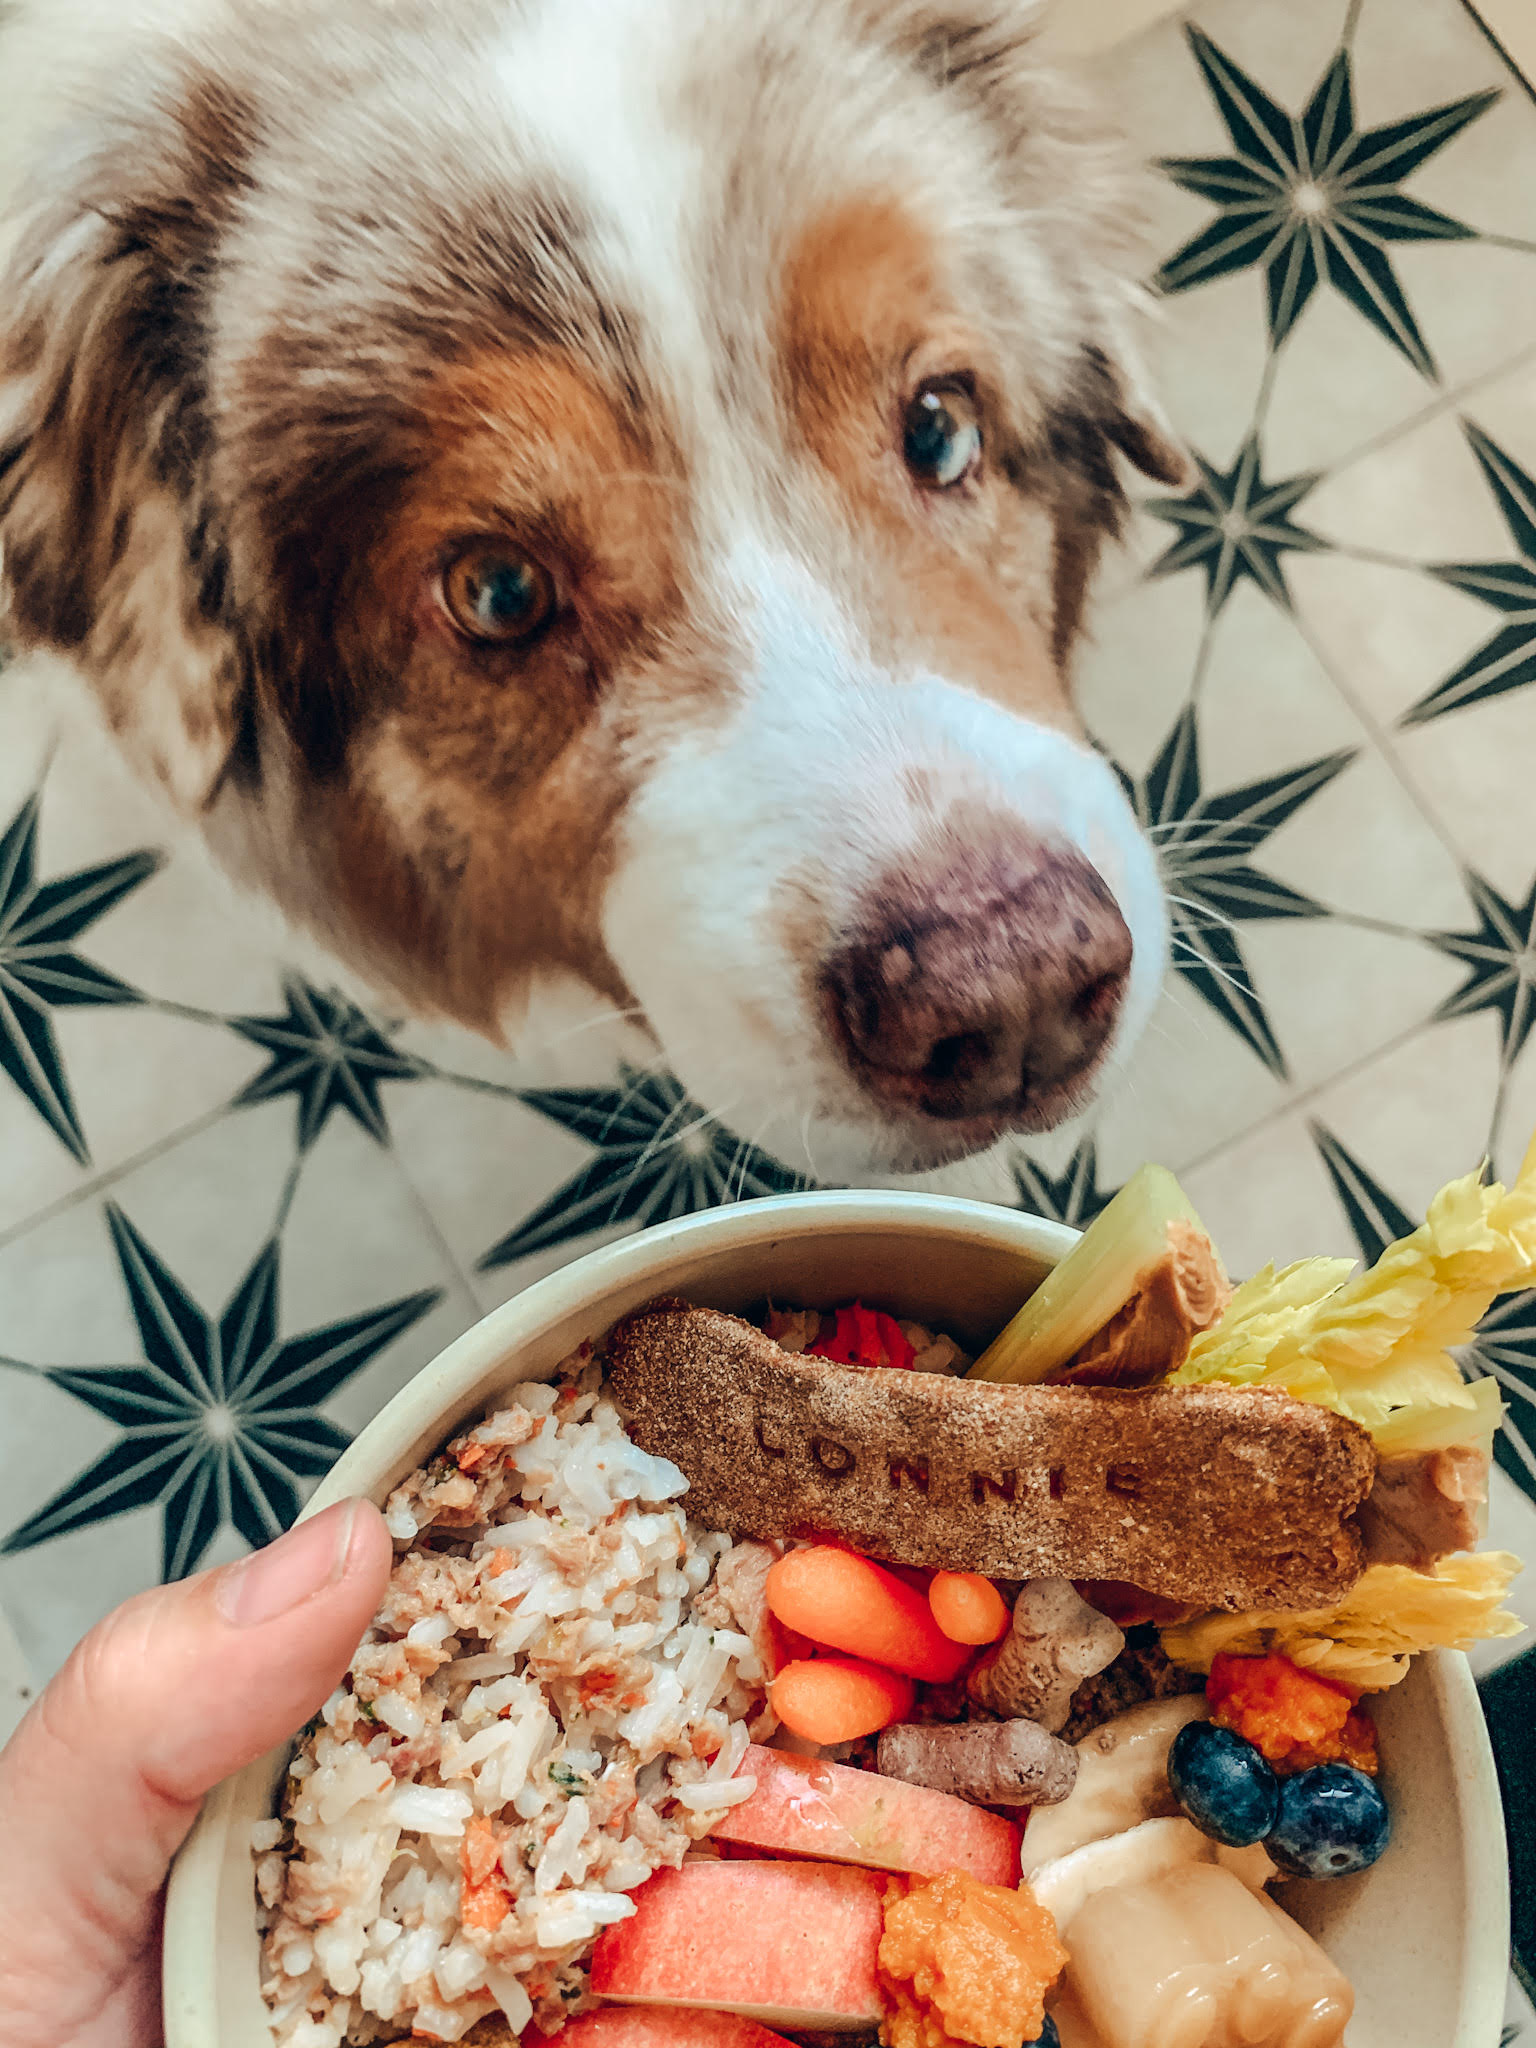
Enjoy these happy barkuterie bowls! I encourage you to get creative and mix up the ingredients to utilize things that you know your dog loves! Make sure to trust your instincts in terms of size and quantity you are feeding your dog and pay attention to calories of each element if that is important to you! These bowls are definitely a hefty snack but packed with a lot of different nutrients, textures and treat sizes, making it really fun for them to eat!
If you re-create this recipe, don’t forget to tag us on social media @ocpupscouts so we can share your awesome creations!
Thanks for joining us in the Pup Scouts Kitchen… till next time, happy bowl making!